
Clarify makes capturing screenshots simple and fast. Use the capture button, keyboard shortcut, or status menu (Mac) or toolbar icon (Windows) to quickly capture images.
The Clarify capture tool even has advanced features:
In addition to capturing new screenshots, you can also drag existing photos or images onto your Clarify document to import them.
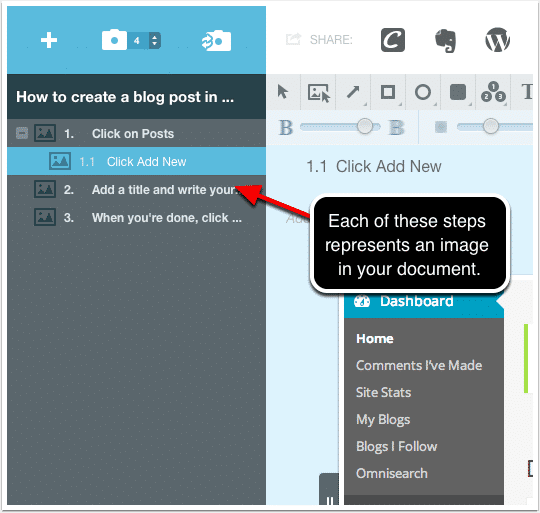
Clarify has one important difference that sets it apart from other screen capture applications. When you capture images, you aren't just saving individual image files, you are creating a document. Each image you capture becomes a Step in your document. You can reorder, insert or delete steps as you create your communication.
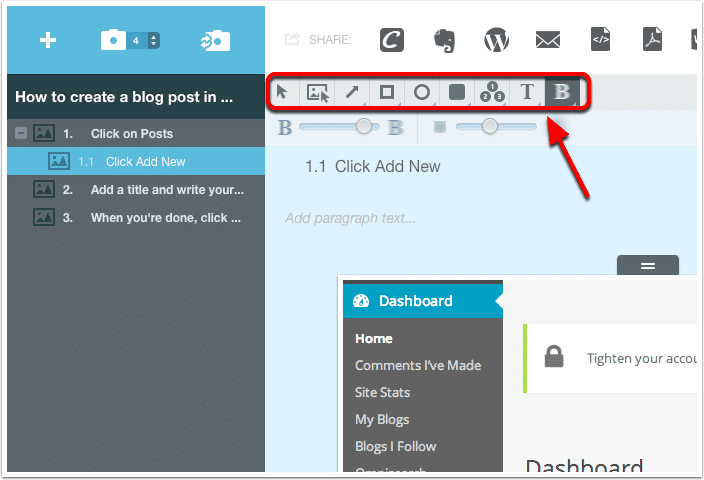
All the tools you need to mark up your images are right inside Clarify. Add arrows, boxes, circles, highlights, text boxes and blur out sensitive information. All of your annotations are non-destructive so you can go back and edit them at any time.
Clarify's image editing tools also let you resize, crop, add additional padding, and add picture frames or borders.

Since Clarify is part screen capture tool and part text editor, you can add text to each part of your document.
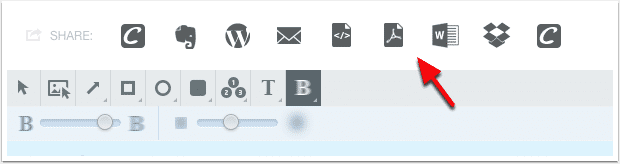
When it is time to share your document, we give you a few options.
Share via Dropbox and get a public URL back that you can instantly send to anyone. Here's an example of a document shared on Dropbox
Use our free Clarify-it.com service to share your document online. All of the images and HTML are created for you - you just get a URL back that you can share anywhere. Here's an example of a document shared on Clarify-it.com.
If you have a WordPress site, you can publish a Clarify document as a post, page, or any other options your WordPress theme includes.
You can also copy the HTML or markdown of a Clarify document so you can publish it an any content management system that supports source code.
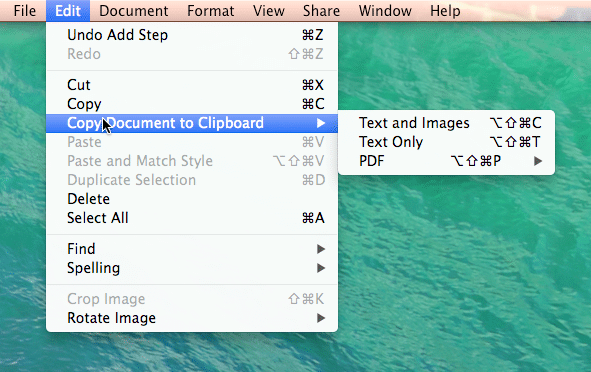
You can also export your document to PDF, Word, Evernote, or as a PDF in an email attachment. Here is an example PDF created with Clarify.
If you just want to include the contents of your document in an email you can copy the document as Rich Text. Rich Text will include both your text and image data. You can easily paste into a new Apple Mail or Microsoft Outlook mail message.
In addition to the export options listed above you can also:

If at anytime you are stuck, great help is only one click away. Visit the Clarify help site to get great, visual tutorials that answer any questions you might have.

LOVE Clarify. Took me 3 minutes to do what would usually take 30 minutes! Clients are happy, which makes me happy!!

The App is genius! Just created an instructional document that would have been 6 paragraphs of exposition otherwise. Thank you!

Just used Clarify to show a workflow and process that has been a challenge to explain verbally. Loving it!

Clarify is amazing! It saves me SO much time and explanation at work and with friends/family
Clarify is one of the easiest and best tools for setting up screen instructions that I've ever used. It's not difficult to figure out, and makes turning screenshots into instructions an awesome experience.
The tools you use to make help documentation for your own users shouldn't be more complicated that what you're already trying to explain ... Clarify solves that. Great tool for saving hours of your life.